Here they come (in no particular order). I'll post brief descriptions, but I'll leave it t their creators to tell you how they made them.
FIRSTLY:
HOLY CRAP that Ghost Rider is AMAZING!!!!! All your figures are great Jeff but damn.....that one is SWEEEET!!
SECONDLY: Jkaris - your camera is too good - it shows up to many flaws on my entries!!!!

Now the breakdown of how made I mine:
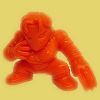
For the contest I chose two of my favourite figures, the first one being MUSCLE #153.
After seeing the great job Reccoom had already done articulating a claw I decided I would have to try something different. I’d really enjoyed some wire skeleton figures I’d had when I was younger so I decided this was a good opportunity to try my hand (or claw!) at it.
MUSCLE plastic was far too rigid to use for this and I didn’t have a Kinkeshi or bootleg to try out so I took a mould using FIMO (like sculpey).
I tried a few different materials to make the figure with; glue, bathroom sealant etc but none of them worked. Finally I tried a kind of rubber latex that is used for making moulds – it worked perfectly!


Once I had the two halves perfect (after about five attempts!) I stripped some electrical earth wire, cut it to size and pushed it into the rubber as pictured. I curled the ends of the wire into a loop for the top of the fingers so it wouldn’t push through so easily. I then put the two halves together using a flexible glue that would have some ‘give’ in it and allow for bending.
I coloured the figure using a mixture of permanent markers and model paint. It bends and holds position without any visible joints!


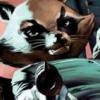
The second figure is MUSCLE #204.
I had a good look at the figure and realised it didn’t really have that much on there that could be articulated (no waist, no elbows, etc) without changing the original figure too much. To compensate for lack of jointing I decided make the joints more relevant to the figure.
First I hollowed out my original MUSCLE figure and cut away the pieces that would be jointed. I used map pin joints for the arms and then map pin joints to connect the legs to the body and hinge joints for the knees. I wasn’t sure if what I had planned for the head would work….
I would have to re-build the inside of the figure to attach all the various pieces, so I tested it out using blu-tac and it worked pretty well.
I made the inside of the figure from a flexible super-glue building it up in layers to allow room for the balls of the map pins and the bulk of the head connection – a push switch!


I coloured the figure using a mixture of permanent markers and model paint.
Here is the finished product – the head pops up and down just like a real turtle would retract it’s head into it’s shell (….well almost!)


And finally; why paint him blue?? To match my Gormiti, Tartantica of course!


I really enjoyed putting these figures together and I would reccomend that
IF Jkaris runs this again PLEASE PLEASE enter - it's great fun!
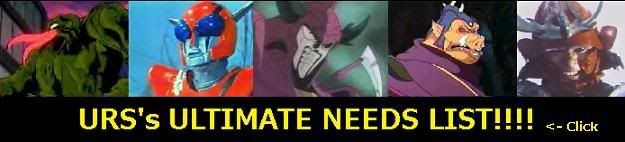
oh, and here's the artwork I did for the packaging (EDIT: hahaha, just noticed the word 'hidden' in the image name):
Edited by matthewf1tz, 12 August 2006 - 05:30 PM.